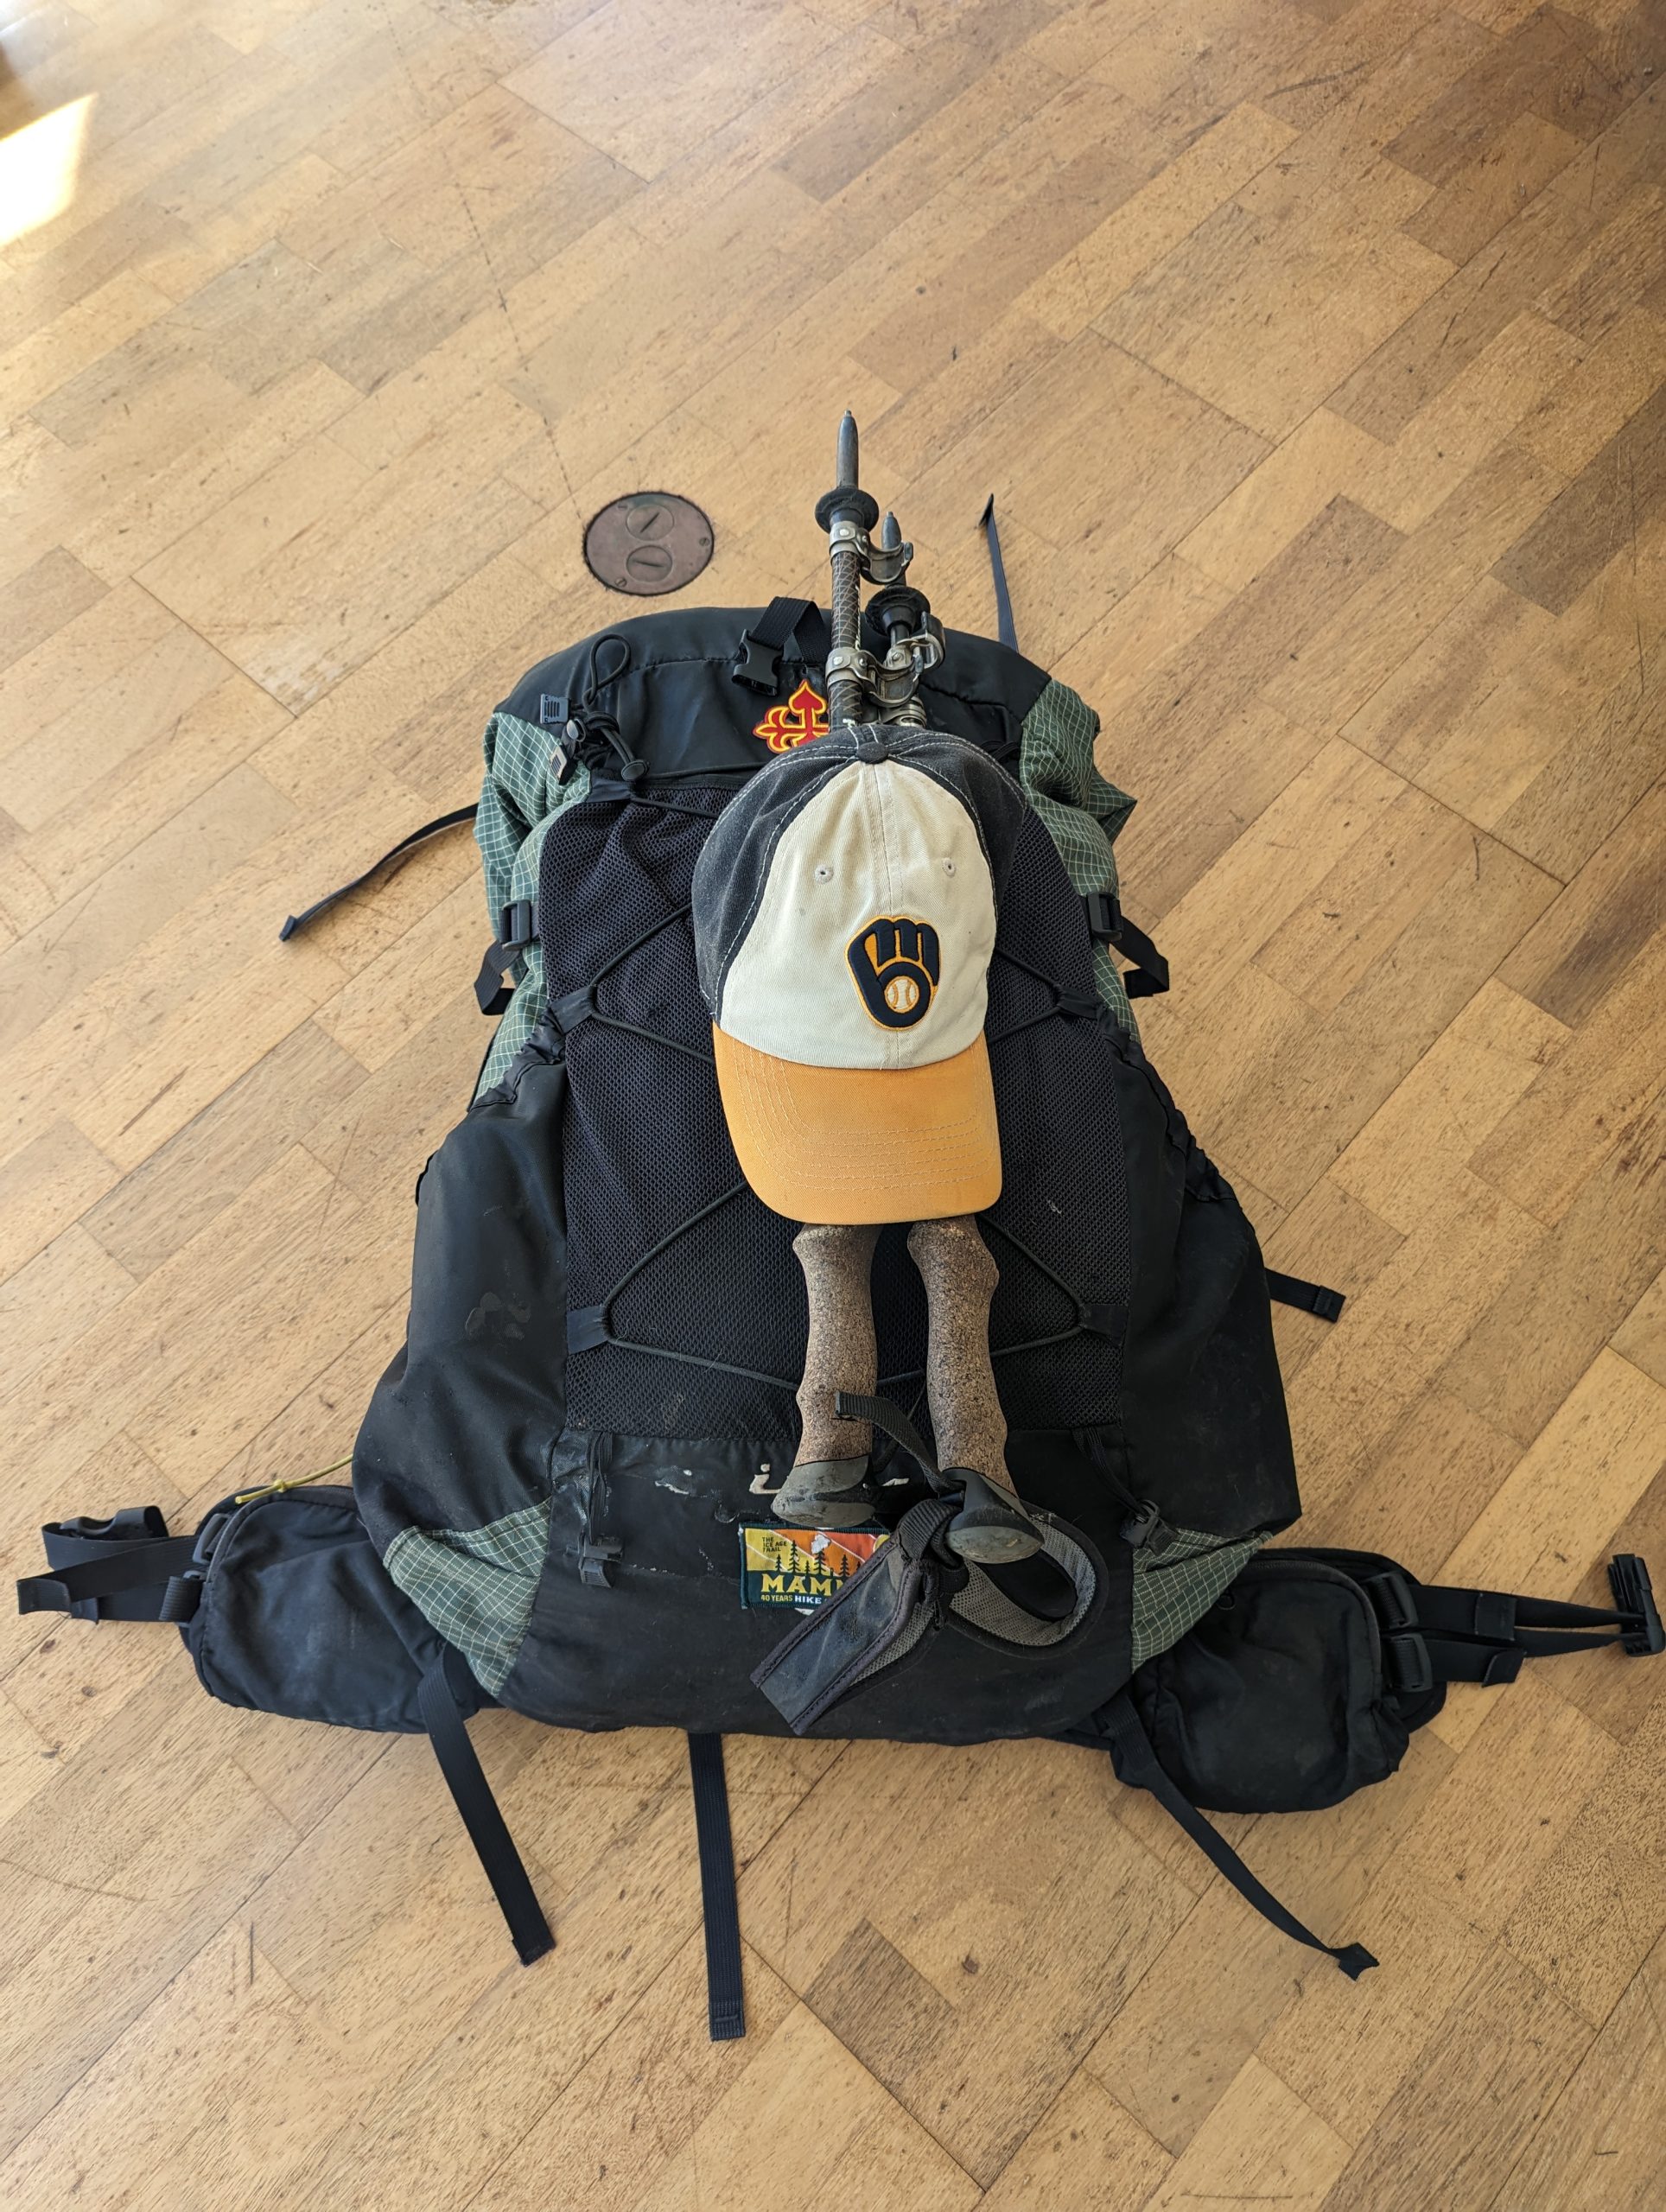
Today I finalized my kit with a base weight of 13 pounds, 5.5 ounces. This kit will handle temperatures as low as 20 degrees Fahrenheit. I loaded it up with two liters of water, a day’s worth of food, and a medium tank of fuel. I barely noticed it.
With that, I need to send a box forward to Fontana Dam and order my hiking permit for the Smokies. I’m ready to go!
My wife asked me this past weekend if I was getting excited. I am leaving next week for a March 6th. start. I told her that in all honesty, I haven’t had much time to think about it. I’ve been focused on crossing off items on the task list.
I finished training my replacement at Calvary Presbyterian Church. I originally came there to help them close. I failed miserably. My replacement is better suited to helping them generate revenue as a home for the arts in downtown Milwaukee. Although it wasn’t necessarily my job, the congregation is healthy and growing.
At home, I’ve finished all the tasks my wife had requested. The downstairs bathroom is remodeled. Many other items have been fixed or refurnished. She is most pleased.
I have finished applying for seminary and will be attending Louisville Presbyterian Theological Seminary this fall. That gives me a deadline of Labor Day weekend to get this hike done. That should be plenty of time. I hike better if I have a deadline. I need to complete a psychological examination. Does quitting your job to hike 2197.4 miles indicate that I’m mentally unstable? I don’t think so. I’m happy to be lost in my thoughts.
I’m able to check the ten day forecast for Amicalola Falls State Park. There was plenty of wailing and nashing of teeth over the amount of rain there would be March 1st., it should all be clear by my start date of March 6th. Low 60’s during the day and high 30’s at night. Perfect hiking and sleeping weather for me.
My flight is currently on time. That is always a concern.
So, I spent some time going over my food situation. I’ll be carrying 3.5 days worth of food at the start. That means I’ll need to hike roughly 12 miles a day. My wife and I did 9.5 in three hours on Saturday. It included some Wisconsin up-and-down, which is by no means AT quality, but did include a 126 staircase. I’ll write up more about my food in a upcoming article.
So, I’ll take it easy for the first couple of weeks until my hiker legs kick in. No sense hurting myself at the start.
It is amazing the difference you feel for your second thru-hike. I don’t have any anxiety this time around. I trust my gear. I know what I’m capable of doing. Resupply is so much easier. Water is plentiful. Soon I’ll be out there crushing miles and making smiles.
We are getting closer and closer to my start date! So, it is time to start reading up on trail conditions. To assist me, I found a past hiker with the trail name of Ramdino who posts weekly on YouTube. I hope that you check him out. I signed up on his list of hikers, so you might hear my name mentioned.
Water
All water sources in listed on FarOut are flowing nicely all the way through the Smokey Mountains National Park. The park starts at the Fontana Dam at mile 166.6 and ends at mile 239.2. Unlike the PCT, water is readily available through almost all of the AT. That in and of itself will significantly reduce my overall pack weight. I’ll keep my water strategy. Camel up by drinking a liter at a water source and carry a liter. That should get me through ten miles. My overall water carrying capacity will be 4.5 liters, two smart water bottles and a 2.5 Platypus dirty water bag.
That may seem like overkill, but if you have to hike to a water source, carrying enough water to cook is really nice.
Snow
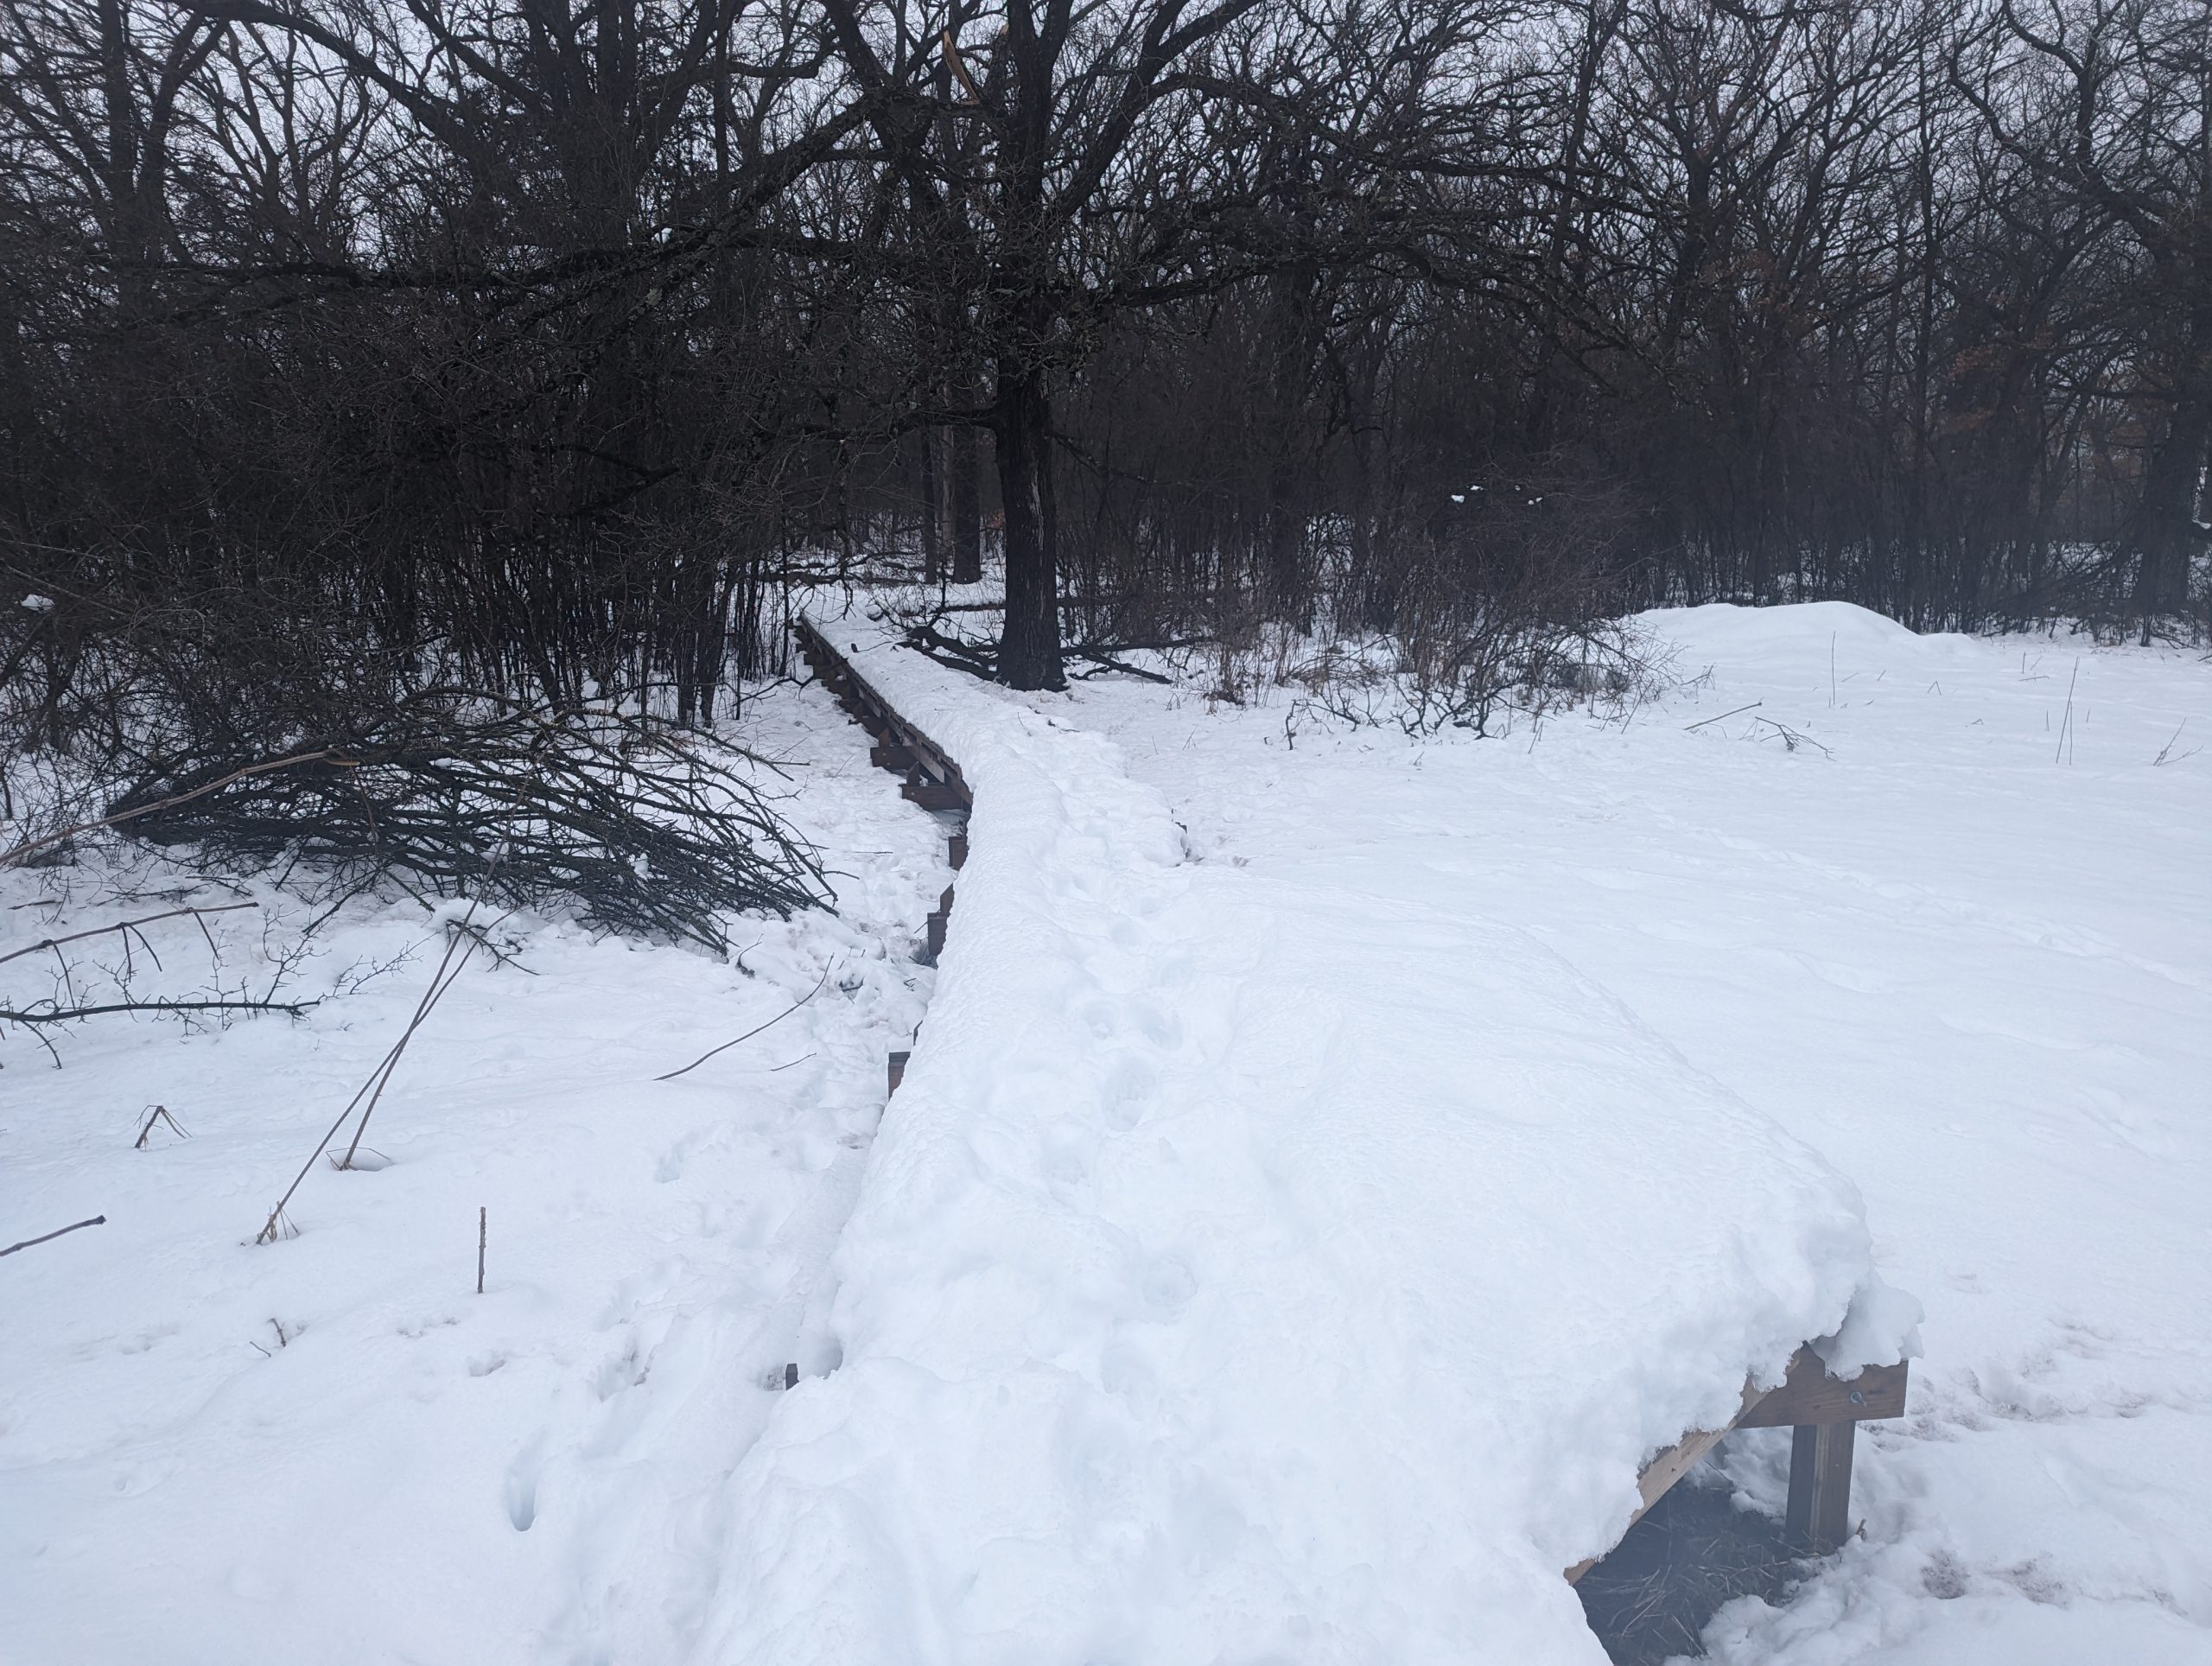
There is snow up in the mountains as high as 18 inches. I suspect that it will be melted by my March 6th starting date, but just to be sure, I’ve added my Kahtoola MICROspikes to my gear list. My wife and I hiked the Monches segment of the IAT on Saturday. There was still plenty of snow and ice on the trail and I had no problem staying at my full hiking pace with them on. They are also good for traction on mud.
I will be monitoring conditions. They weight 13.1 ounces, but provide X-Mode traction in snow. Better traction means fewer calories burned. I can always return them after the Smokies.
Weather
It has been cold but manageable. What I’m going to do for this hike is fly down wearing some Kirkland Jogging Pants. Instead of tossing them when I change into my hiking clothes, I’m going to take them along. I’m hiking the IAT in them with a pair of 32 Degree Heat base layer and I’m just fine. I’ll have them for the evenings and if conditions are very cold at night. Once it becomes warm, I’ll toss them. After 200 miles or so, they won’t fit anymore anyways.
I’m a Wisconsinite. We wear shorts once the weather is above freezing. Once I’m walking, I’ll warm up. It is extreme heat that I worry about.
Conclusion
I’ll be keeping an eye on the snow levels. I have the gear to deal with it if need be and I can always send stuff home.
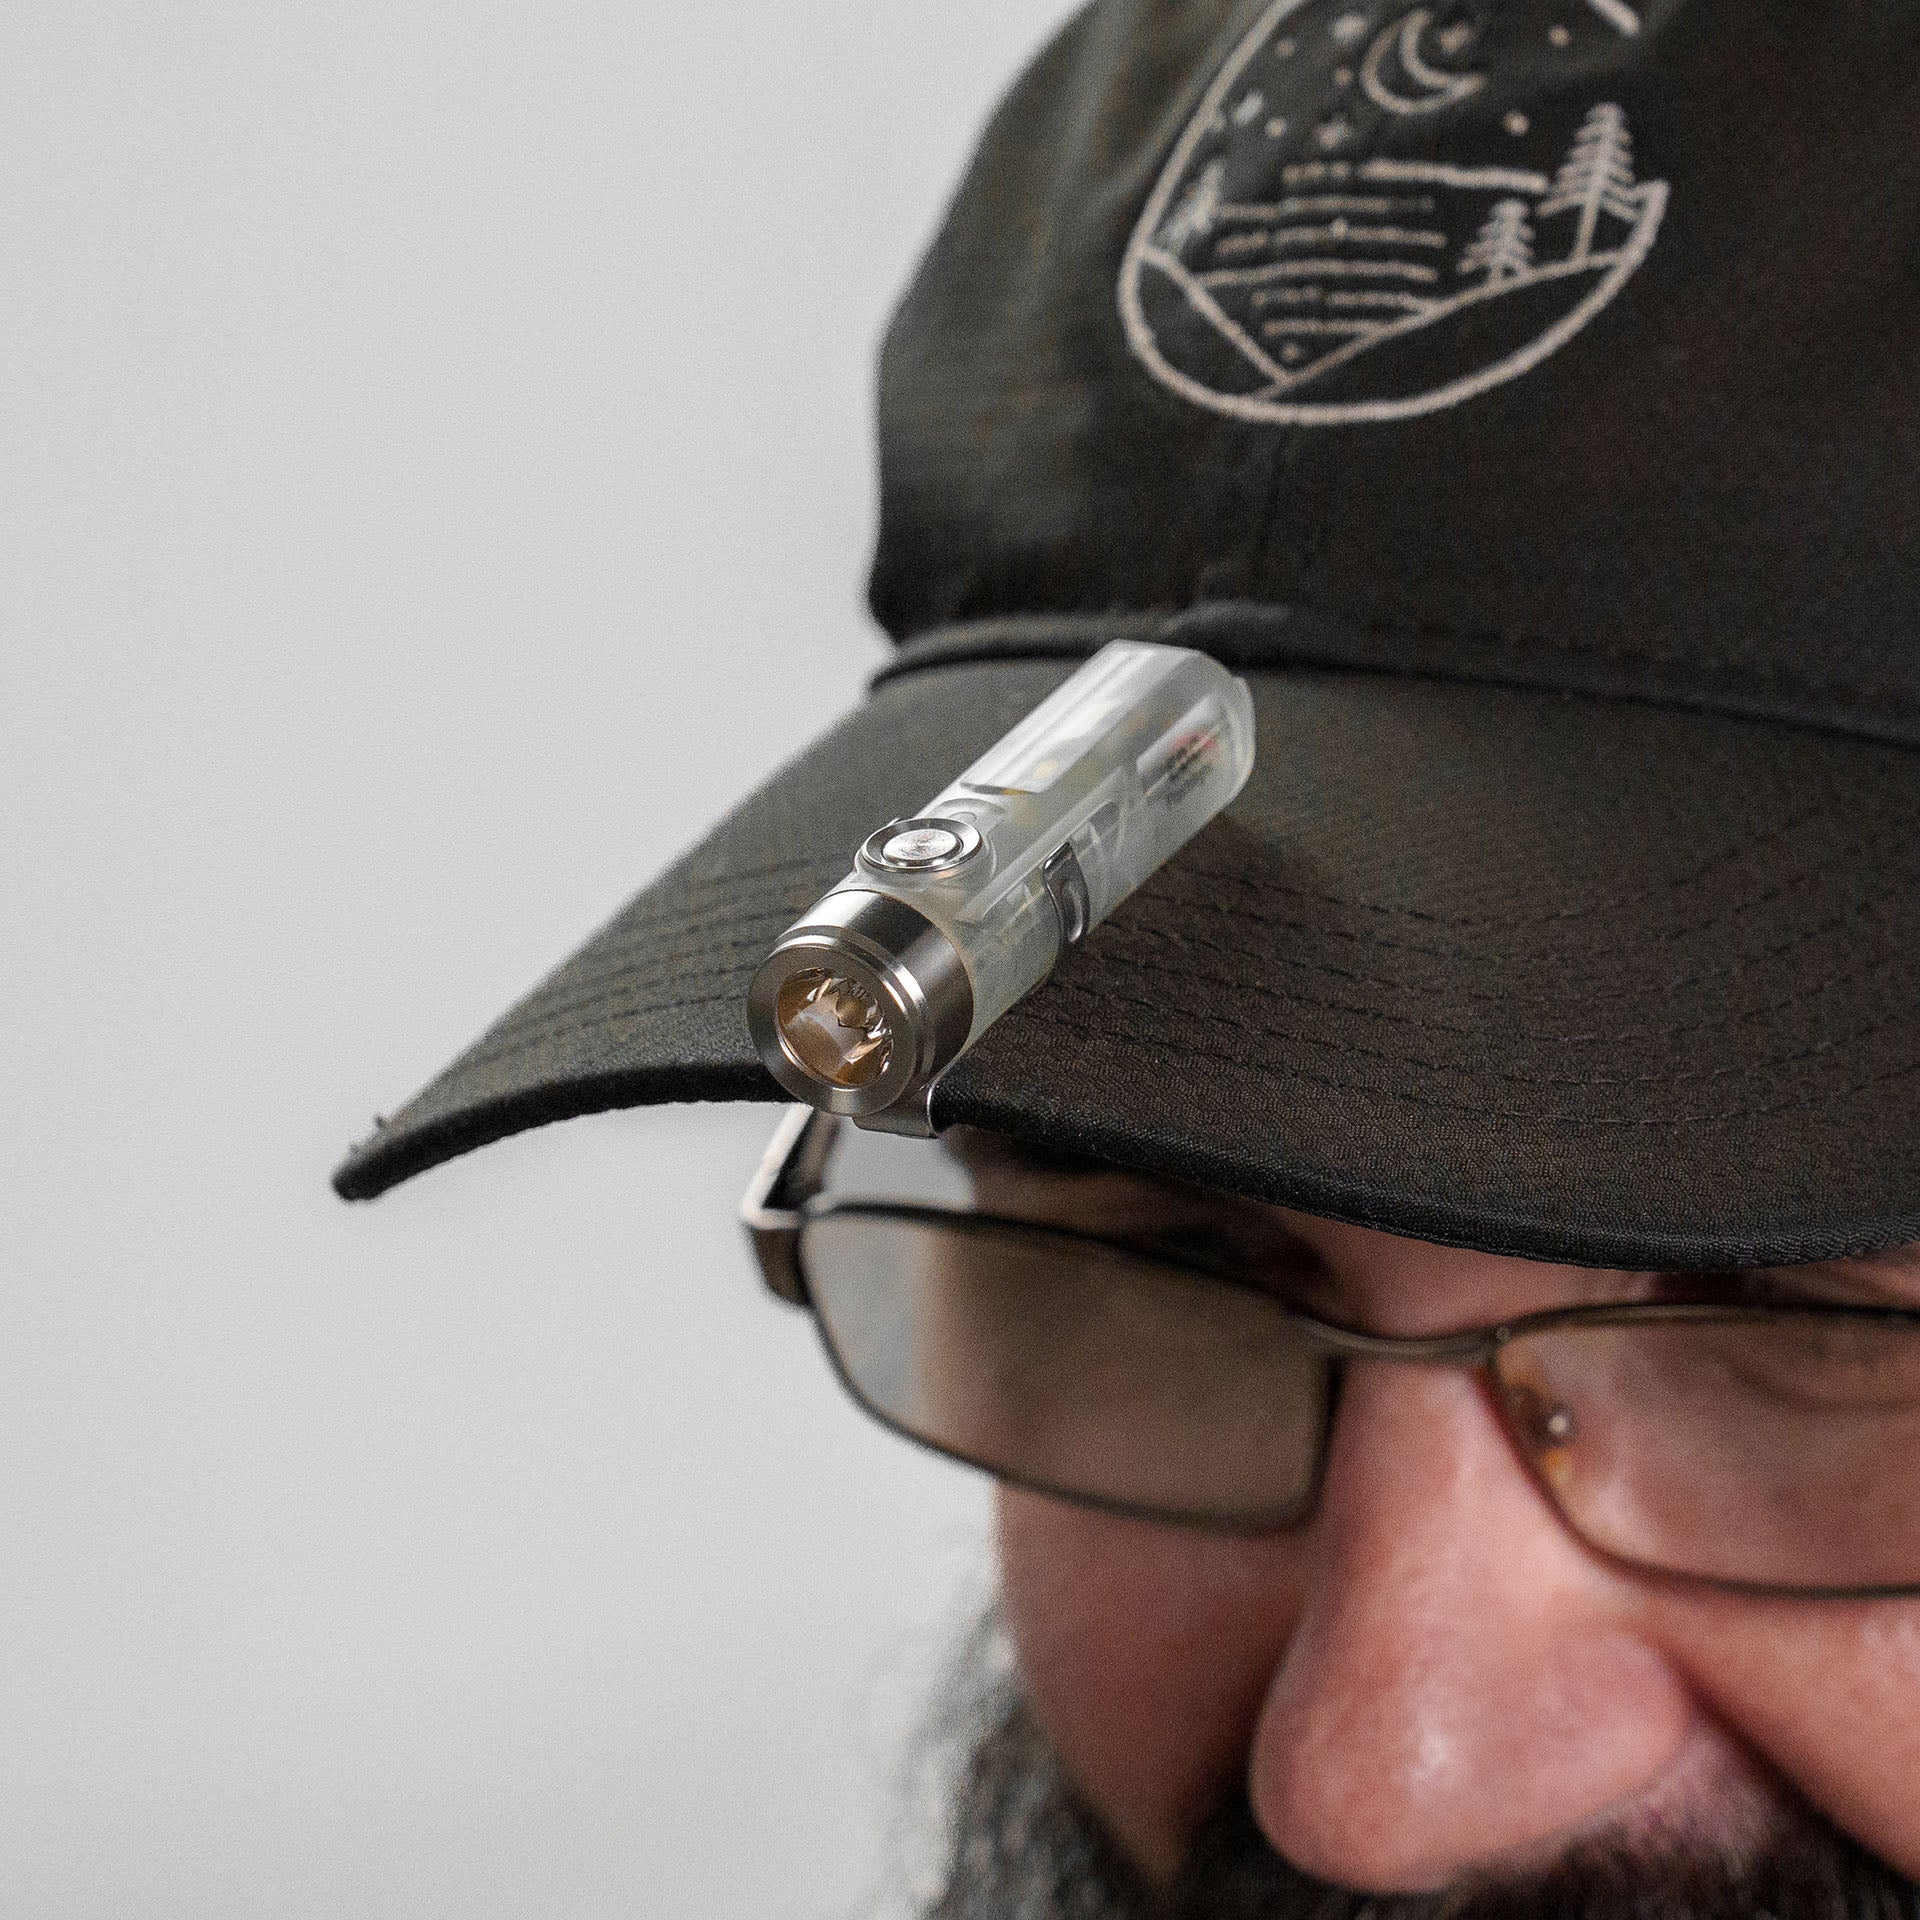
Just as my last blog post is published, I receive an advertisement from zPacks. They have a new flashlight / headlamp that meets all my requirements. It is the A5 Hat Clip Flashlight, a lightweight flashlight with a clip that allows it to be used as a headlamp. It also has a lantern mode. It has a USB-C port for charging, so I do not need any different cables. More importantly, it weighs just .8 ounces and costs just $36. My Zebralight H52W weighs 2.9 ounces and a spare AA battery is .7 ounces. That is a 2.8 ounce weight savings for not much money. Needless to say, I bought it immediately.
I brought up my gear boxes from the basement and into the sunroom that has been converted into the Quartermaster’s Office as I’m now just forty days from the start of my attempt of the Appalachian Trail. I have multiple stations set up.
The first station is for my gear. I have a small scale and my tablet open to LighterPack.com. I am not assembling a brand new kit. Much of my gear from the PCT is still in excellent condition. It pays to take care of you kit. Nothing escapes the scale, even if I weighted it before.
To protect me on the PCT, my daughter gave me a Pokémon keychain to clip outside of my backpack. She chose a Manaphy for me. For those of you who are not Pokémon masters like my daughter, Manaphy is a water-type. Julia felt that a water-type would be a good match for the first 700 miles of desert. I would never go thirsty. As I completed the PCT, this keychain has become a good luck charm.
The good news is that Manaphy has dropped .1 ounces in weight. When I weighed it back in 2018, it was .6 ounces. Today it is .5! With that weight savings, I can afford to take a bandage! Who am I kidding? I’m five years older than my last 2,000 mile hike. I’ll use that weight savings to carry more Ibuprofen!
My sawyer squeeze is also getting a checkup. I bought a brand new one a long time ago. Although I have not used it before, I find that running clean water through it before you leave means that all the air bubbles will be pushed out. When I connect it for the first time on trail, it will work right away. I have a 2.5 liter dirty water bag that has a loop in it for an easy gravity hang. The 2.5 liter capacity allows me to gather enough water for dinner, cleanup and late night tea.
I’m still considering some gear swaps. My headlamp is a Zebralight H52W. It was great on the PCT. It’s only downfall is that it requires a AA battery, which means I’m carrying a spare, which is extra weight. I cannot remember if I even changed batteries on the PCT. I avoid night hiking unless I absolutely have to, so I used it sparingly. I have also considered dropping from a 20,000 mAh power bank to a 10,000 mAh. That would save me some weight. Mostly all minor changes.
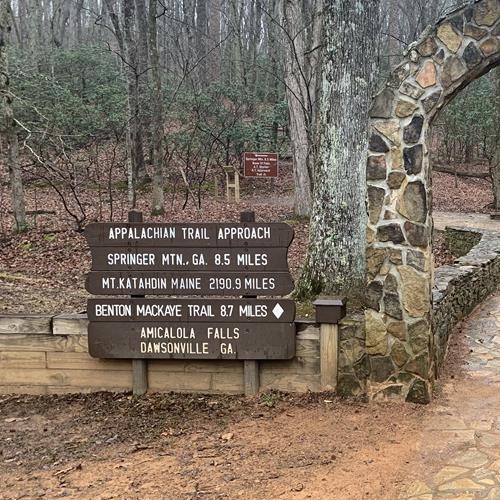
The next station is for my food. My first resupply is Neels Gap Mountain Crossing at mile 31. It is a full service resupply point and it is right on trail. I just need enough food to get there. I will be dropped off at Amicalola Falls State Park which is 8.8 miles south of the Southern Terminus, so I’ll need an extra days worth of food. The approach trail is going to be tough from the get go. It is a 3,000+ foot climb over eight miles. Should be fun!
It is funny. When I finally reached the Northern Terminus of the PCT, I was rewarded with an 8 mile hike to Manning Park and civilization. For the AT, I’m rewarded with bonus miles right from the get-go.
I am hoping that everything runs smoothly, but if my flight is delayed for some reason, I’ll have a day’s worth of food. So, if I arrive too late to hike to the start on March 6th, I’ll just camp at Amicalola Falls State Park and start the next day.
I also need to ship a box to Fontana Dam, NC at mile 164. As I understand it, the resupply options there are weak, so I’ll pack five days of food, which is more than enough to get to Gatlinburg at mile 208. So, before I leave, I’ll ship a box there. I will resupply on trail the rest of the way.
My second resupply box isn’t needed until Harper’s Ferry at mile 1026. I’ll have time to sort that out before I get there.
With the kit locked down, now it is time to lock down a starting date and transportation. For the Pacific Crest Trail I used Guthooks and Yogi’s PCT Handbook. For the Appalachian Trail, I’ll use Guthooks (now renamed FarOut) and AWOL’s AT Guide.
I cannot start until sometime after March 4th. The earlier the better, however. Tickets to Atlanta airport are quite reasonable. I found flights for less than $200. I will need to check in my backpack, however. (Remember when that was free?) My pocket knife that is smaller than my pinky and my trekking poles cannot be in a carry-on bag.
I’m also using Reddit this time. The reviews for Ron’s Appalachian Trail Shuttle were excellent. I texted him. $140 from the airport, plus he’ll sell me iso-butane fuel as I cannot take that on the plane. He is very knowledgeable, which is always helpful. While this isn’t my first rodeo, I really know nothing about the AT.
So, I’m going to finish up looking at flights and get that locked down. Then I’ll Venmo Ron for the transportation and I’ll be good to go.
Update 1
I was able to snag a flight to Atlanta for just $98! My start date is March 6th. It is a very early flight, but I will be in Atlanta before 9:00 a.m. I also figured out that I’d rather start at Amicalola Falls instead of the Southern Terminus. That will give me the full AT experience and cuts down my shuttle cost to $120. He’ll have a medium iso-butane canister for me, so I’ll be ready to go. I’ll check in at the visitor’s center and get my tag. Then I’ll start making my way.
Ron asked me if I had a trail name. I said that I was given the name Fine Young Buck, but chose to only use Young Buck unless I reached the finish. Standing before the Northern Terminus between the United States and Canada, I accepted my full trail name. I also said the name was a fitting joke as I was in my 50’s. He asked if I would keep it. I said that I would let the trail decide that. I sent him my picture at the end of the PCT and he felt I should keep it.
I might. However, when I take those first steps, I’ll just be JP.
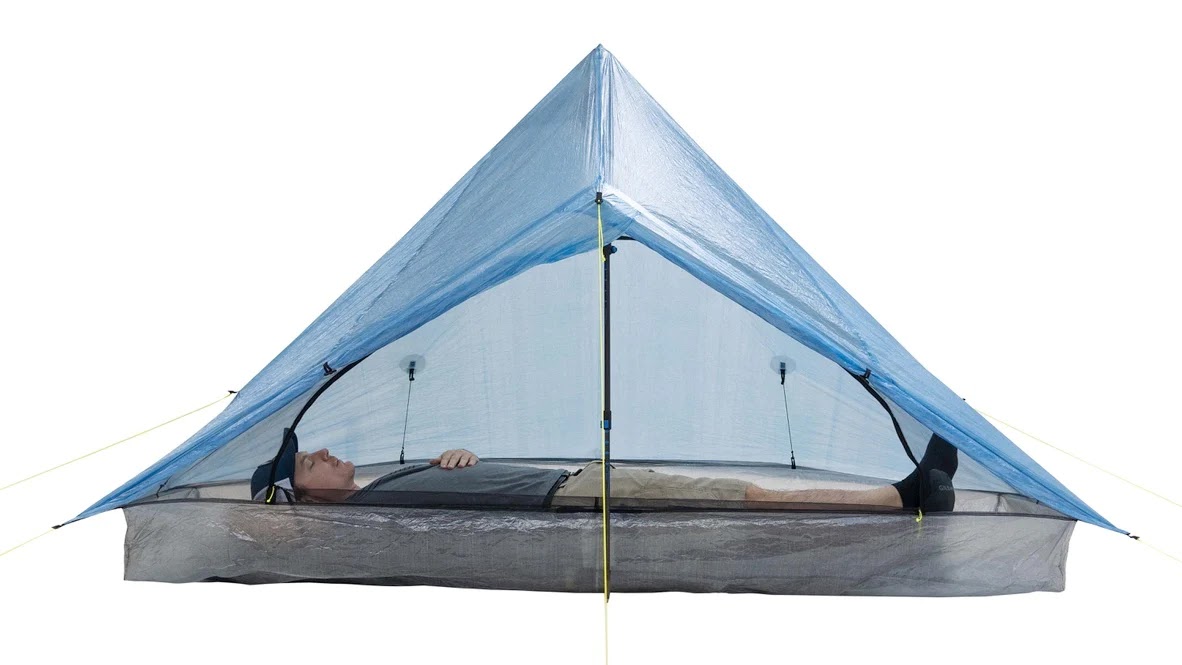
I finally received my new tent in the mail today. It is the last piece of gear I am replacing. So excited! As I talked about in my last post, this tent was purchased from zPacks’ bargain shelf. So, the $60 question was “Why was it there?” Was it a return? What there come cosmetic material defect? Were there issues found during quality control? Unfortunately, I do not know. zPacks never told me. I went over it with a fine tooth comb and I didn’t find any defects or repairs, so I am assuming it is a return.
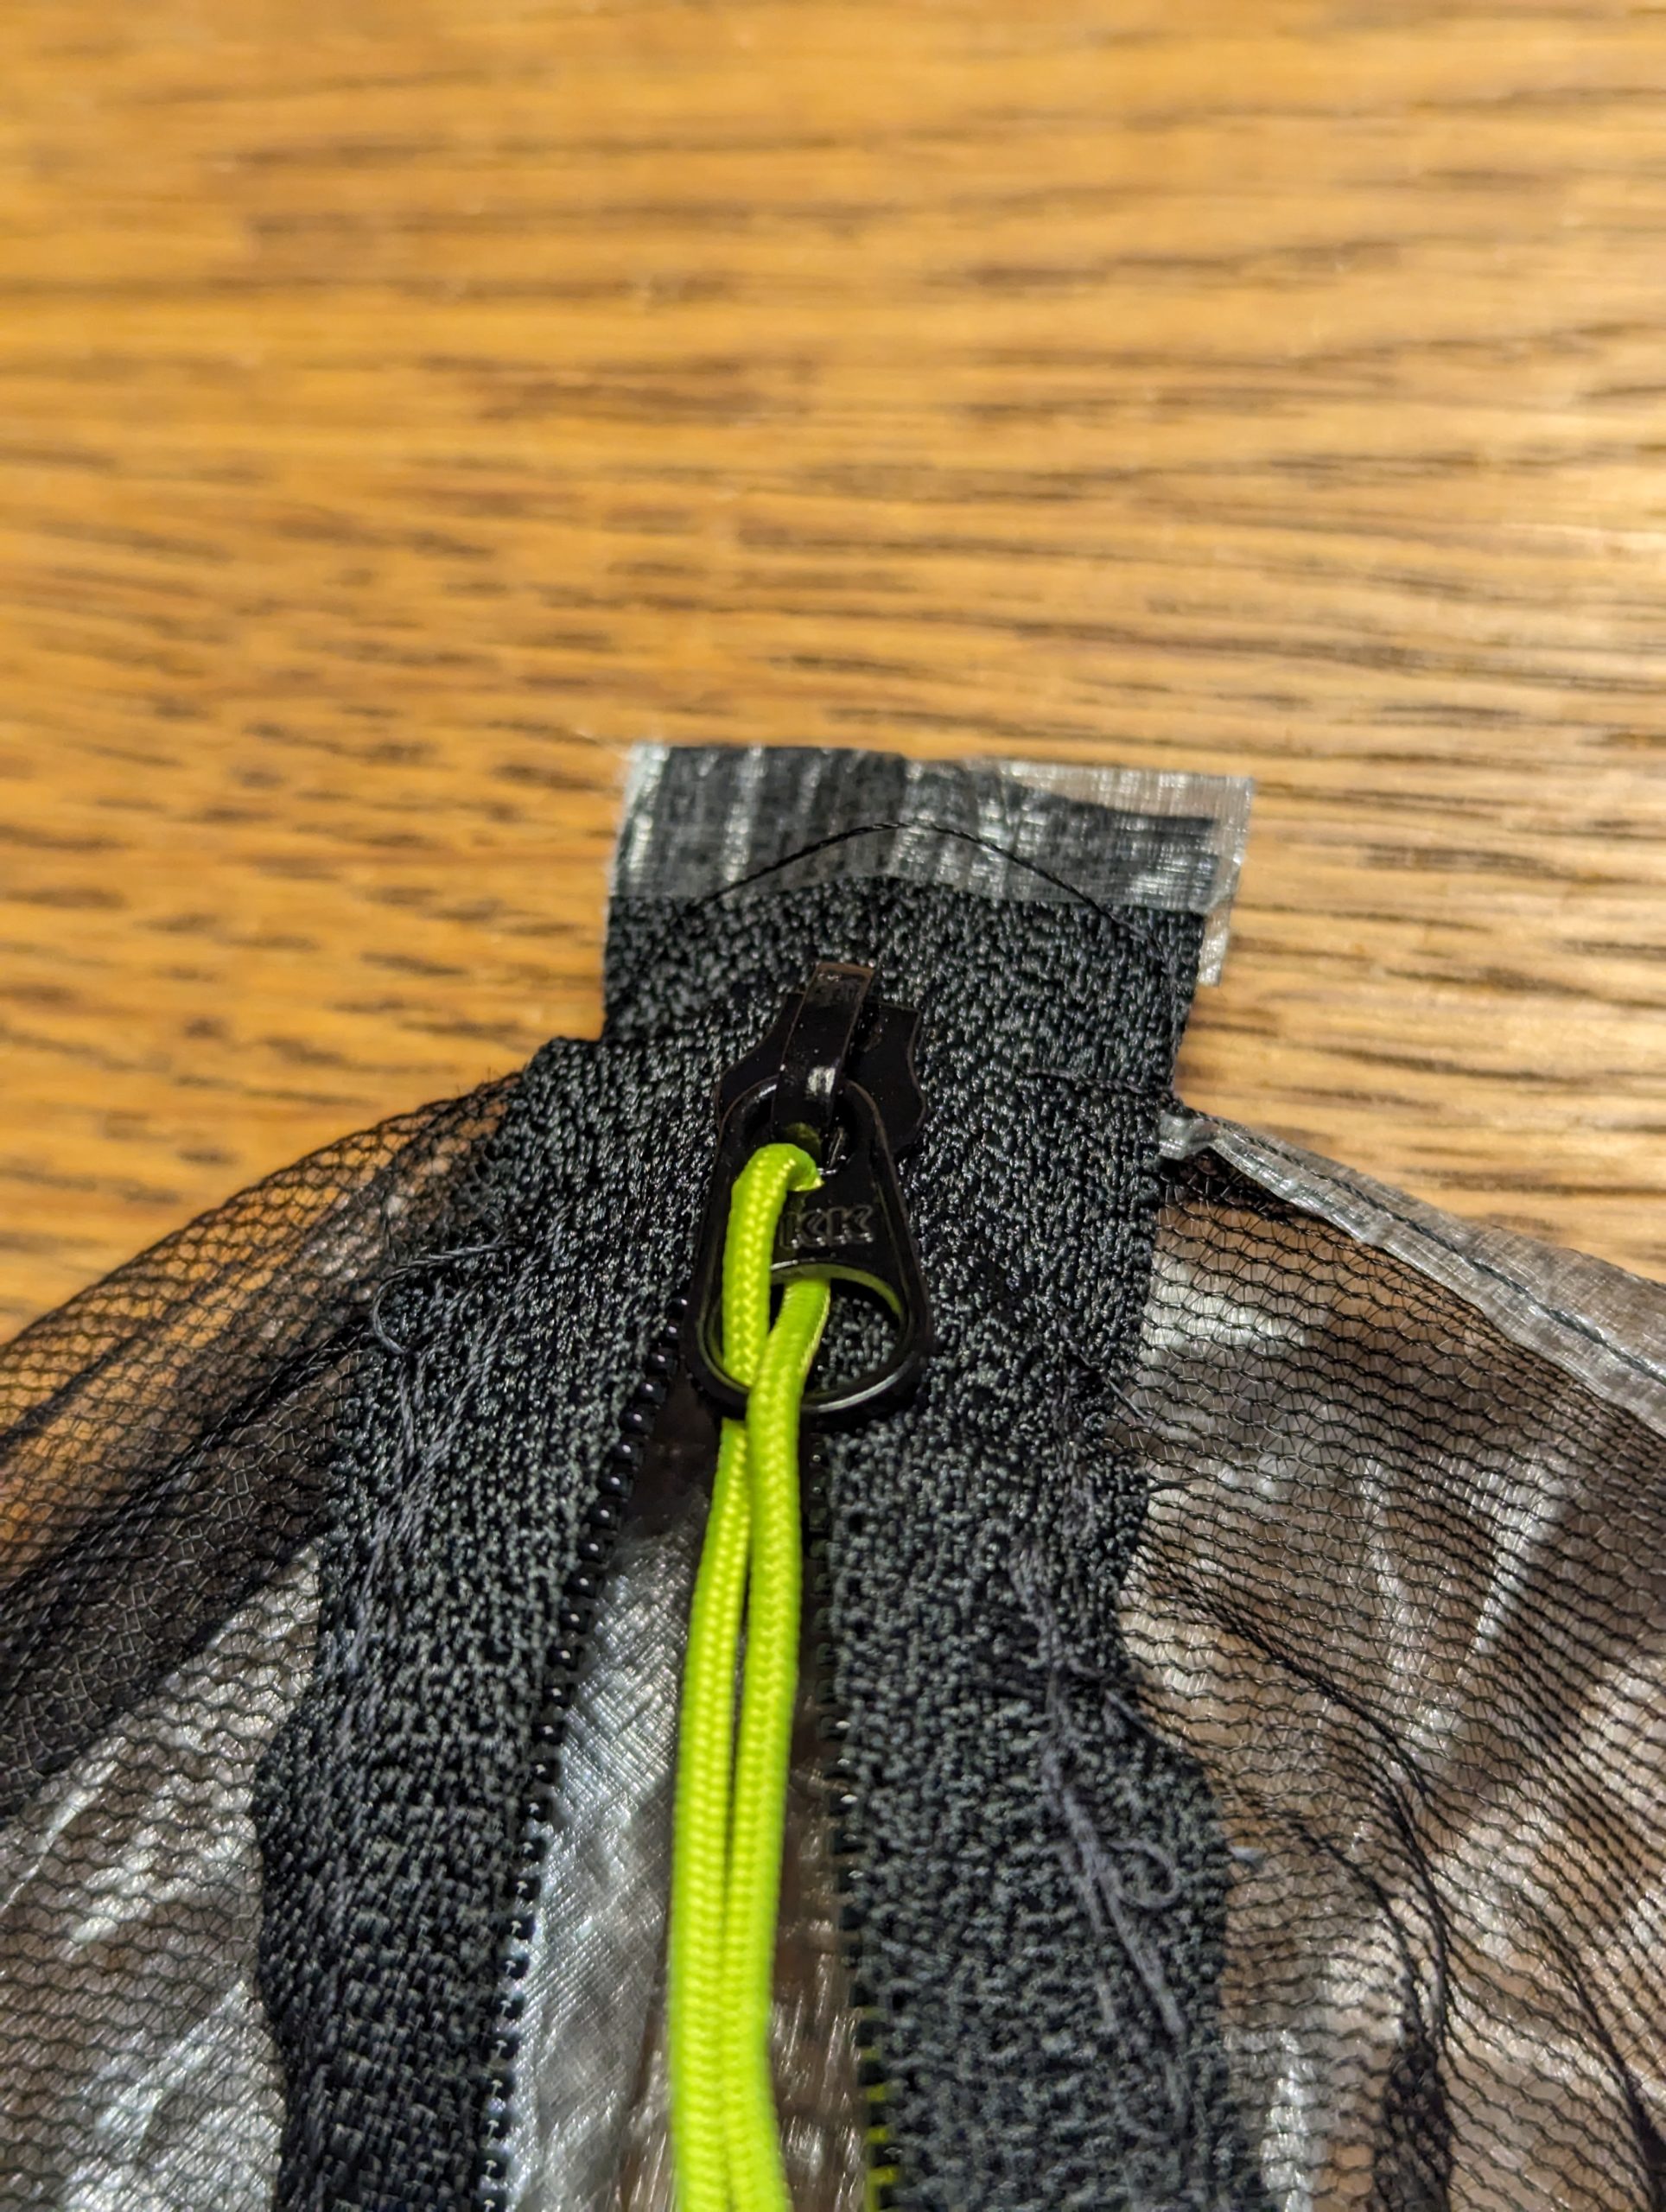
It was the zipper slider that failed for me on the PCT. That was not a problem exclusive to me. My friends Nap and Bubbles also had a critical zipper failure from a different manufacturer. The dust and grime does a number on zippers. zPacks realized that and came up with a simple solution to the problem. It was the reason I ultimately chose their tent. Here is the end close up.
As you can see, the teeth go all the way down. There is no bottom stop or a retainer box. It ends in piece of tape. If the slider fails, you remove the tape, replace the broken slider, and tape the end again. The the materials are included with the tent.
The old way required the use of scissors and thread and a needle. It was a one hour job, but it could be done in the field. With this improvement, I can do the repair in less than five minutes. That will be important on the AT because there will be bugs. Stinging and biting bugs.
It there is a negative to this tent, it is the material. It is pretty see through. I’m going to turn 55 years-old on trail. You want to watch? More power to you.
I went on the zPacks website and found a brand new Plex Solo in blue in the bargain bin for $60 off. I bought it immediately. There are a couple of reasons why the tent might be in the bargain bin. The single biggest reason is that it is a return. I know that many people new to backpacking purchase a specialty tent only to discover that they are completely different than the camping tent they have always used. Backpacking tents are tiny! zPacks tents are as minimal as they come, which makes them seem flimsy, but I can attest that they are very well made. I could take my Hexamid. Despite a PCT thru-hike, it is still waterproof.
Another possibility is that there is some minor material defect, such as blotchy color. I do not care about how it looks. It is going to get dirty very quickly. There also might be some minor sewing defect that needed to be repaired. It will be taped and it will have the same guarantee as an unblemished tent, so I’m good with that.
This tent is different than my Hexamid Solo Plus. On the good side, the Plex Solo weighs 5.8 ounces less. While I’ll miss the removable bathtub, the bathtub on the Solo Plus will do a much better job of protecting me from splatter when it rains. Finally, zPacks makes the zipper very easy to repair in the field. For an additional $0.50, I also purchased an extra #3 Pull Zipper slider which I will add to the repair kit. Set up is pretty much exactly the same. I was able to pitch my tent in less than two minutes in the dark by the time I made the Canadian border.
The one big negative is that this tent will be smaller than the Hexamid Solo Plus. Although I’m 5’9″, I bought the tent for someone 6’5″. That left plenty of room for gear. I’ll have to get used to that.
One other change I’ve made is that I will go with a zPacks Food Bag instead of my Bear Vault BV500. I received plenty of helpful advice after I blogged what I was going to do. There is a short three mile stretch were the bear vault is necessary over the entire hike and most shelters have places to hang or a bear box. A zPacks food bag weighs 1.5 ounces while the BV500 weighs 43 ounces, so that is some significant weight savings.
With that, my kit is complete. Now back to training!
I love the thru-hiking community. It is a diverse community with a wide range of backgrounds. Each and every person has their reasons why they pack a small number of necessities into a backpack and go spend four-to-five months out in nature. Living out in nature is a very unorthodox life.
That being said, it is also a community that has its own orthodoxy. For example, there is a belief that you cannot say that you have thru-hiked a trail unless you walk every single mile. I always found this one rather silly. If that is the case, then no one has thru-hiked the PCT legally since 2013. A portion of the trail was closed to preserve a nearly extinct toad and no one is allowed to hike that portion. Some do illegally, but walking on preserved land is also strictly against the Leave No Trace code. I have always taken the stance that one hikes the trail that is in front of you. If what is in front of you is dangerous, then you must reroute — and that is okay.
The walk every step orthodoxy is very much alive on the AT. Fortunately, as the senior trail, she is well established and one can actually do it. That is for another discussion. What I want to talk about is whether one should carry a bear canister the entire hike.
When I thru-hiked the PCT, there were two areas where one had to carry a bear canister. The longest part of the trail was the Sierra Mountains. Normally that means shipping your bear canister to Kennedy Meadows South (mile 703.4) and sending it home at Kennedy Meadows North (mile 1018.1). Yes, there are two Kennedy Meadows in California. It was very annoying to see ultralight backpackers with their tiny packs zooming without a bear canister.
One of the core principles of Leave No Trace (LNT) is to Respect Wildlife. If you are hiking through an area where an animal lives, you should nature alone. Nature provides balance. There is just enough food for the creatures that live there. Don’t tamper with it. Eating the berries that are meant for the local prey animals can put nature out of balance. We carry our own food and are not in a survival situation.
The black bears spend the summer and fall foraging for calories so that they have enough fat reserves for the winter. Because of that, nature has tuned their tastes towards desiring calorie dense foods Who has an ample supply of calorie dense foods? Why, humans do! So, it is critical that bears do not taste human food lest they associate humans with calorie dense food. Once that happens, it means that park rangers will have no other choice than to kill the bear.
In my opinion, killing a perfectly healthy bear because they discovered that they like Cheez-Its is morally wrong. I don’t judge the park ranger. I blame the visitor walking through carelessly and not properly storing their food so the bears can’t reach it.
On my PCT hike, I discovered what it is like when a creature learns that human food is delicious. Fortunately, it was not a bear. It was a chipmunk that got into the bear box at Warner Valley Camp (mile 1351.4). The bear box was left open and it chewed into my food bag. It also damaged my friend Nap’s as well. Fortunately, Tenacious Tape is ideal for a repair like this.
The Appalachian Trail Conservancy has made it clear that everyone should carry a bear canister. On their thru-hiker Frequently Asked Questions page they say the following about carrying one:
Yes – bear canisters provide the most surety
and flexibility to ensure bears on the A.T. do not access human food,
therefore providing the best protection for bears against becoming
habituated to humans and human food. A fed bear is a dead bear.
There is more detailed information on the ATC’s webpage on Bears.
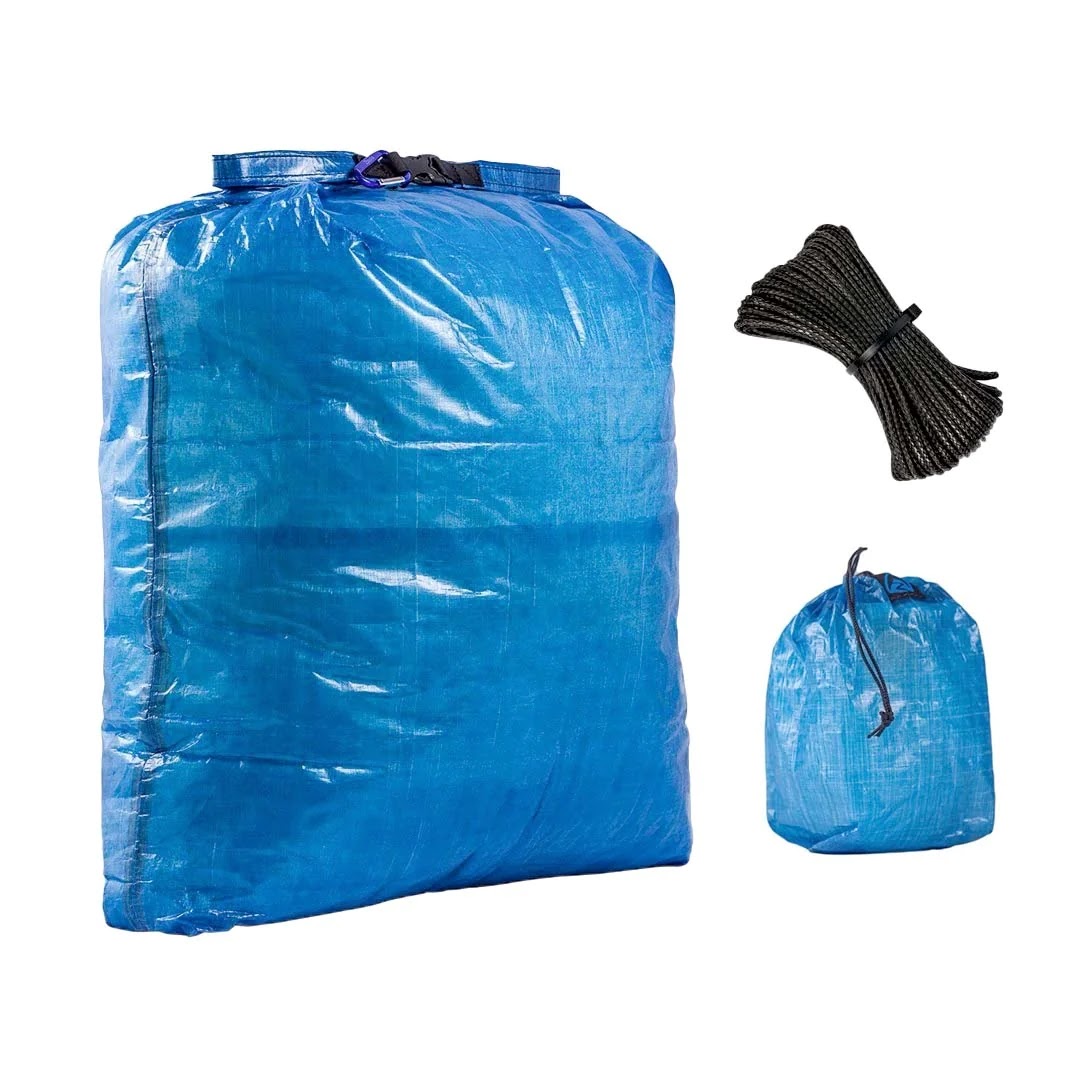
For most of my PCT hike, I carried a zPacks food bag.
This is the ultra-light solution. Weighing only 3.4 ounces, it handled the entire PCT, SHT, IAT, and multiple camping trips. The bag was awesome, but I will not use it on the AT. I’ll carry my bear canister instead.
Here is the problem with bear hanging. When you are tired — really tired — the last thing you want to do after you are done eating is hang your food. So what do you do? You use your food bag as a pillow. In the case of this light weight solution, the cordage is also very light and is constantly tangled. It also becomes quite unmanageable once it is sticky with pine sap.
The proper thing to do is to suck it up and carry the canister. It weighs 2 lbs. 11 oz. However, a full one-liter Smart Water bottle filled weighs 2 lbs. 5 oz. On the PCT, I often had to carry three filled Smart Water bottles and I’ll never have to do that on the AT, so it is a wash. The canister also makes a fine camp chair, so it serves a dual purpose.
I’ll probably be one of the few who properly follows the rules. I’ll try not to judge the action of others.
I hiked the PCT in 2018 with a zPacks Hexamid Solo Plus. It was an outstanding tent. Its light weight allowed me to carry a more robust sleeping solution because I’m a side sleeper. That means I need more cushioning for my hips, so I carry two sleeping pads. A good night sleep is critical for a successful hike.
What I really liked about the Hexamid, was the removable bathtub. I could use the bathtub as a floor if I cowboy camped separate from the rest of the tent. I also took it out when it rained and kept it in the dry portion of my pack. When I made camp, I would put up my tent, and away from the rain I would install the bathtub. I could then strip out of my wet clothes and my tent was completely dry.
That doesn’t mean that it was perfect. It suffered from a critical zipper failure at Crater Lake. The zipper no longer properly zipped. I used some safety pins to pin up the insect netting. It wasn’t a big deal as the mosquitos were not bad in Oregon and Washington in 2018. I had on night when I set up camp at a stealth site where ants got in. Nothing wakes you up like an ant crawling on your stomach in the middle of the night!
Despite my best efforts, dirt entered into the throat of the slider so the slider was no longer able to lock the elements. Yes, backpacking teaches all the proper named of the different parts of a zipper. The top and bottom stops; the elements on the tape; and the slider. The slider has a pull tab connected to a crown with a body and the throats.
Once I was home, there were instructions on zPack’s website on how to repair the zipper and had I been in a better communication situation, I could have fixed it in the field rather easily. All I needed was a new slider and to clean the elements. I had a scissors, Tenacious Tape, and a needle and heavy duty nylon thread. I fixed it and it works fine. I also needed to fix a couple of holes in the bathtub and the fly. There are many many pokey things looking to make pin holes in your gear on the PCT. Tenacious Tape is your friend.
Regardless, a tent made with Dyneema Composite Fabric is designed for one thru-hike. All that packing and unpacking is not good for it. I still use this tent for backpacking and camping, but it is not going to last another 150 day hike.
So, as I wrote, I am deciding on a new tent. zPack’s doesn’t make the Hexamid Solo Plus anymore. It has been replaced with the Plex Solo. The Plex Solo is lighter, but has a dedicated bathtub instead of a removable one. Because of that, I started looking around at different models. The Durston Gear X-Mid Pro 1 was very intriguing to me.
The Durston Gear has a unique layout, using two hiking poles to set up, but only requires four tent stakes. My Hexamid required 10 stakes. Although neither tent has a removable bathtub, the amount of cowboy camping I’m doing on the AT is rather limited. Between the rain, condensation, and bugs, I’ll be in my tent pretty much every night.
So, that means it all comes down to the zipper. It is what failed before.
There was no documentation on the Durston Gear site about zipper repair. I asked on Reddit and received very limited feedback. Basically, I need to take better care of my gear. Well, I did take good care of my gear, but sleeping on dirt means your zipper sits in the dirt.
zPacks, on the other hand, has you covered. To fix the zipper on the Hexamid required some cutting and sewing. On the Plex Solo, the zipper slider is designed to be quickly replaced in the field. They even have a video on YouTube on how to do it.
So, when I purchase the tent, I’ll purchase an extra slider for .50-cents and I’ll be good to go.
As the two tents weight and cost the same, it comes down to which tent I can fix easily in the field. That means that the zPacks Plex Solo will be my final choice. I’ll purchase it next month or so.